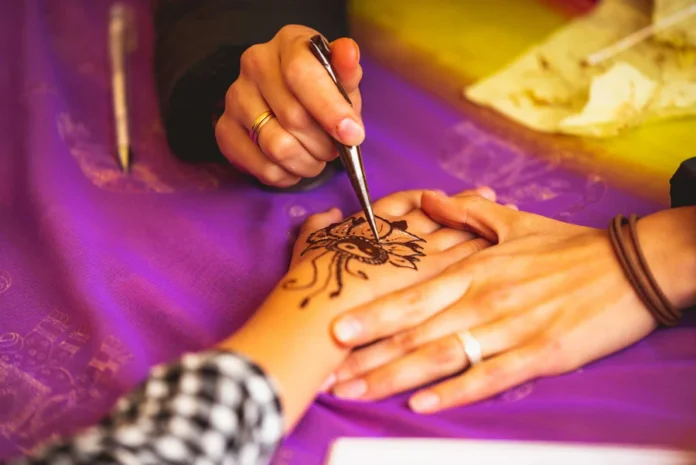
Do you love to paint cute henna on your hands but are too afraid to try it? If so, this is the perfect time to awaken your inner artist and embark on a colorful, creative journey into the world of henna.
Whether you’re preparing for a special event or festival or just want to decorate your hands and feet with beautiful temporary art, henna designs are a great way to express yourself.
Today, we’re dedicated to providing this fun, easy, comprehensive guide to henna design that you can quickly try as a beginner. They’re fun to create and leave everyone in awe of your newfound henna skills. So roll up your sleeves (this time), and let’s dive into the vibrant world of henna!
Ready to immerse yourself in the magic of henna?
Henna designs are beautiful and a great way to tap into your creativity. As a beginner, so much henna art is waiting for you to explore. So gather your materials, explore your favorite designs, and start creating! But remember to complete this look with Mersi Cosmetics’ halal nail polish line.
Whether you’re decorating your hands or feet, henna art is a delightful, temporary way to express yourself. Have fun, embrace the process, and let your inner henna artist shine!
Henna paste preparation
You can buy natural henna paste at the store or make your own at home. Making henna paste is easy and fun.
It would help if you had henna pollen, a liquid (usually water, lemon juice, or tea), and essential oils to make henna paste.
- Mix all of these ingredients to achieve the desired consistency.
- Once ready, you can fill it in tubes or cones to easily create complex designs.
- Materials you’ll need (everyone takes notes!)
Have you had enough of the henna basics? It’s time to gather the necessary materials. Here is a list of some essentials that beginners may need.
- Henna paste (tube or cone)
- Pencil (for sketching designs)
- Paper towels or cotton balls
- Coconut or almond oil (after treatment)
- Henna design Template (optional)
- Creativity and enthusiasm (must)!
Once you have all your supplies ready, you can start applying henna.
6 simple henna design ideas for beginners
While today’s henna templates can make the application of henna a breeze, they can’t compare to the fun of creating your designs. Some popular, fun, and simple henna designs are perfect for beginners. Let’s get started!
1. Classic flowers
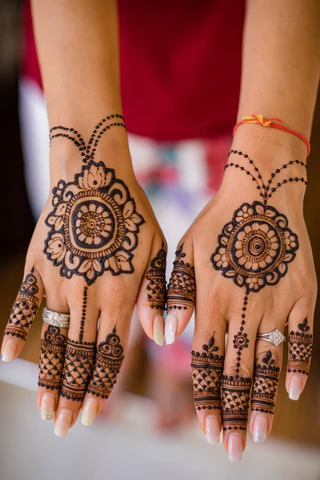
Start with a classic flower design. Start by drawing a small circle in the center of your hand or foot. Add teardrop-shaped petals around the circle. You can keep it simple and use one flower or draw a string of flowers. This is the most straightforward and most decent design on the list.
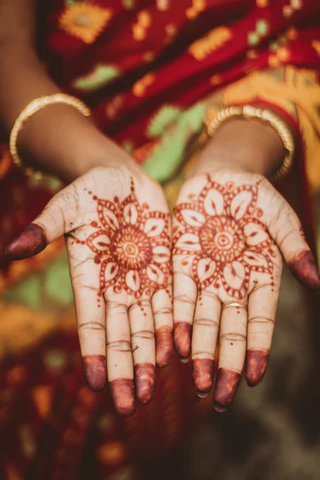
You can apply it to the front or back of your hand. Best of all, you can customize it according to your style preferences and creativity.
2. Classic vines
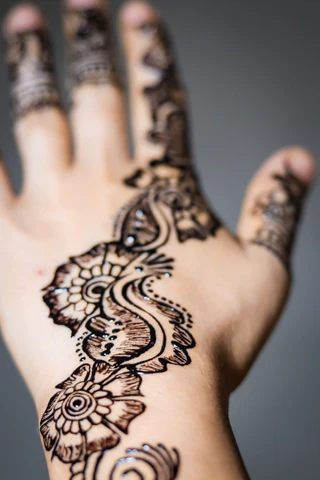
Draw a curved vine along the side of your hand or arm. Add flowers and leaves to the vine every once in a while. This design is elegant and easy to create. You can even extend it to a more refined look.
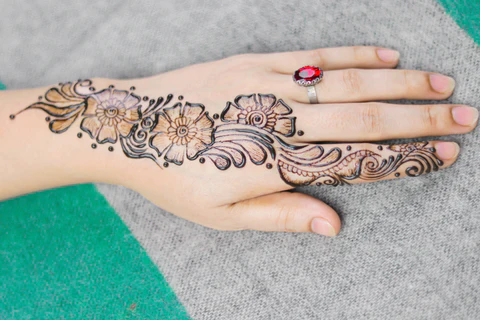
You can also create a vine with only flowers or leaves. Apply florets to the remaining fingers or leave them as they are; both variants look great!
3. Peacock feathers

Peacock feathers, with their intricate patterns, are a popular henna design in the Indian style. Start by drawing elongated shapes similar to the eyes of peacock feathers. Add curves and dots for details. The design is open to personalization, allowing you to create multiple feathers with your unique touch for an engaging look.
To make the design more attractive, add leaves, flowers, and other motifs. You can also decorate it with rhinestones to enhance the peacock feather design.
4. Minimalist bracelets
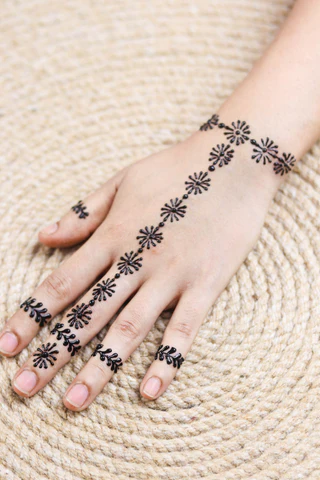
You can choose a simple bracelet design if you like a sophisticated style. Draw a series of connected small triangles or dots around your wrist. This is an exquisitely chic henna design that can be easily customized.
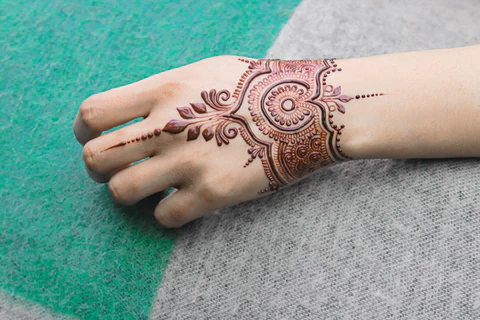
You can enhance your bracelet with intricate patterns and shapes as you practice.
5. The sunshine
For a bold and eye-catching design, let your creativity flow with the corona. Begin with a small circle in the center, and then draw the sun’s rays radiating outward. You can add dots or small shapes at the end of each light to add extra style, making each bracelet a unique piece of art.
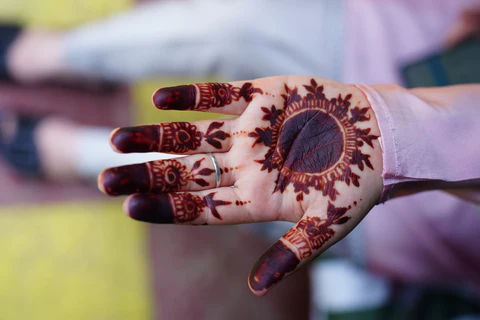
This design looks good on the back of the hand. To complete it, you can apply henna to your fingertips.
6. Finger accent
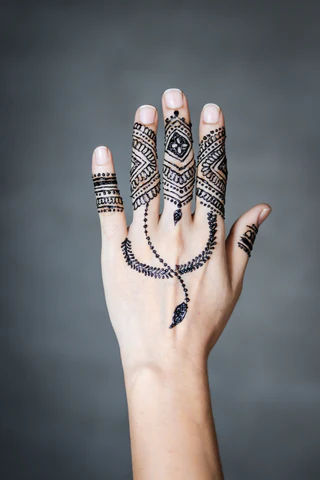
Do you like all-finger henna? They look simply irresistible. As a beginner, you can try this design by drawing straight lines on your fingers. Reinforce the lines with similar patterns and polka dots.
Extra tips for a memorable henna experience
Learning henna as a beginner is a rewarding experience that you can cherish. Here are some tips to make it more memorable and rewarding.
- Practice makes perfect. Your first attempt may not be perfect. Don’t worry; that’s how we learn. Don’t be discouraged if your first try isn’t perfect. Henna art takes practice. Keep practicing, and you will soon notice significant improvement.
- Be patient: Once you’ve applied henna, be patient. Please don’t rush to wash it off, or you’ll leave a lasting stain. That’s not how it works. Let the henna paste dry on the skin for a few hours or overnight for the best color results.
- Avoid using too much water (when washing): To ensure the henna lasts longer, try keeping it dry for a few hours after applying it. You can leave it overnight for better results. Even after you have washed, you should not keep your hands in the water for too long.
- Experiment and have fun: Feel free to experiment with your unique designs. Henna art is about self-expression! Be creative and create your designs instead of just copying others. You’re going to love it.
Henna smear technique
You can apply henna designs using various techniques, including hand drawing, stencils, and cones. Freehand painting offers creative freedom, while stationing offers precision for beginners. Cones, similar to frosting bags, are a popular choice for making fine lines and delicate patterns.
Aftercare and longevity
Once you’ve finished the henna design, let it dry completely, then gently remove any excess paste. The henna stain will gradually darken over the next 24-48 hours and may last from one to three weeks, depending on skin type and care factors. To lengthen your henna design, avoid excessive moisture and scrubbing.


